


Learn About Canoes & Canoeing, Part 2
In this second part of filmmaker Jason Eke’s 2-part series “Master the Canoe” for beginning paddlers, he discusses the topics of loading your gear, canoe safety, how to choose a paddle and the most important paddle strokes.
Take a look at the video:
How to Load a Canoe
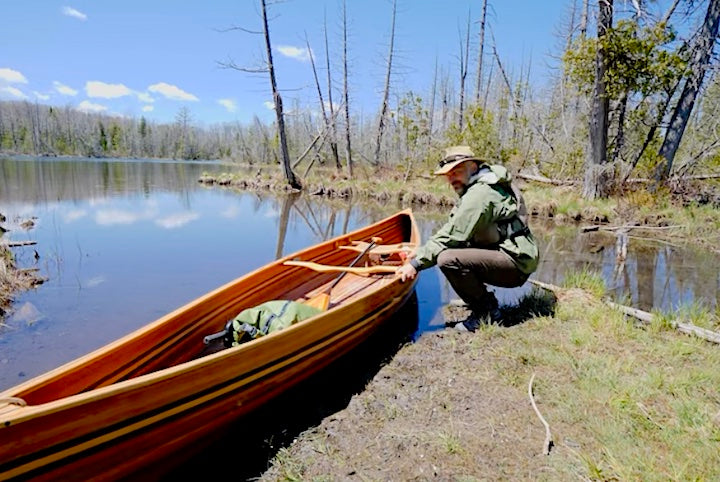
The key to loading gear into a canoe is to evenly distribute the weight of your gear. Keep in mind your own weight if paddling solo, or the weight of both people in a tandem canoe. While distributing the weight between front and back, also keep the gear as centered in the canoe as possible from side-to-side.
Since Jason’s solo canoe has a rear seat, his gear goes in front of him. If you were to paddle a solo canoe with a center seat, your gear can be distributed both behind and in front of you. For tandem canoes, the gear will be between the two seats.
Keep the weight evenly distributed and low in the canoe
Keep the gear’s center of gravity as low as possible, which will keep your canoe more stable. And if you can, keep your gear beneath the height of the gunnels so the wind doesn’t have a chance to catch it.
Canoe Safety
Know the safety guidelines for any areas you’ll paddle, as well as any specific rules that may pertain to state or national parks and wilderness areas. Some water bodies require special permits and many now require you to submit your canoe to an invasive species inspection by local authorities.
Your most important safety item is a PFD—Personal Flotation Device, commonly known as a life jacket. It’s important that yours fits snugly but comfortably. And, of course, it does you no good if you don’t wear it!
Other safety items can include:
- Whistle or air horn for signaling in case of emergency.
- A container for bailing water in case of heavy rain and/or waves.
- Throw rope—50 feet of rope is always useful even if you don’t need it for an emergency. It might even be handy if someone else needs help.
- If you’ll be out overnight be sure to bring along at least one waterproof flashlight or headlamp, with maybe another as a backup.
How to Choose a Canoe Paddle
Jason refers to several different styles of wooden canoe paddle in his video. He notes that a blade made from laminated wood pieces glued together is more durable than a blade made from a single piece of wood. He also comments about how a reinforced blade tip will increase the durability and longevity of your paddle.

Jason talks about several different styles of canoe paddles
He touches on four different styles of paddle:
1. A Beavertail paddle has a long and narrow traditional blade with a comfortable grip. This style is best for deep flat water and is wonderful for many hours of paddling. Because of the long blade it’s not great for paddling in the shallows, though.
2. An Expedition-style paddle with a T-grip gives you excellent control. These paddles are extremely durable with fiberglass layers over the wood and reinforced protection around all the edges of the blade. The wider, shorter blade works well in both deep and shallow water.
3. Branches’ Sunburst paddle is Jason’s new favorite. The laminated wood blade has plenty of protection from the edging and fiberglass wrap. The blade is big enough to move plenty of water and it has the modified t-grip for lots of control. The carbon shaft adds to the price, but it lessens the weight by several ounces. If you plan to canoe long distances often, that extra price will be worth it.
4. Solo canoeists sometimes prefer a double-bladed paddle (usually known as a kayak paddle!) for excellent control, especially in rough water and wind. With a blade in the water at all times you have better control in tough conditions.
One style Jason doesn’t touch on here is a bent shaft canoe paddle. In a bent shaft, the blade has a 10 or 11º angle on it which makes it super efficient and easy on your shoulders and wrists for long days on the water.
The paddle you choose really comes down to preference. Many avid canoeists bring a couple different paddles with them, especially on long trips. That way they can use the one that works best for any situation they’re in.
Canoeing Strokes to Master
There are four main types of canoe strokes to begin with: forward, back, pry and draw. Where you place those strokes in the water will determine what direction your canoe moves.

Learning canoe strokes and mastering them is essential for both safety and enjoyment
Once you learn those basics strokes, you can add a few more variations for the best control over your canoe in every type of condition:
Forward Stroke—An easy stroke with nothing technical to learn. In a tandem canoe, the forward stroke is used by the person in the front (the bow) almost all the time. The one in the back (stern) will use it at times, too, in-between other strokes.
Goon Stroke—Used by the stern paddler. It’s a forward stroke with a pry at the end of the stroke that helps to correct the bow’s turn. It’s much like the J-stroke, which is next, except that your thumb on your grip hand always faces up. Because of the pry at the end, this stroke adds a bit of drag.
J-Stroke—Because a forward stroke from the stern of the canoe turns the bow away from the stroke, the J-stroke (and goon stroke) corrects that motion to keep the tip moving straighter. As you finish your forward stroke, turn the thumb of your grip hand down and the blade forms a “j” pattern in the water. It’s more efficient than the goon.

Canadian Stroke—Similar to the J-stroke, but this one uses the gunnel to help with leverage and to rest the shaft a bit. It’s great for long canoe trips because it’s easier on your wrists over many hours.
Silent Stroke—This is basically a modified J-stroke. Instead of lifting the blade out of the water at the end of your stroke, you turn the blade in the water and leave it in as you bring it forward. The shaft makes a complete turn with every stroke. You get no paddle drip and no wind resistance on the blade.
As a stern paddler or solo canoeist, you can use all of those strokes interchangeably to help steer the canoe in the direction you want it to go. It keeps you from having to switch sides continually (which can get exhausting after a while) and from zig-zagging down the lake.
You’ll use these next three strokes when you want to maneuver in tight spots or avoid obstacles:
Pry Stroke—A pry moves the canoe away from the stroke. You start with a flat blade next to the canoe and push out.
Draw Stroke—For this one you start with a flat blade (parallel to the canoe) away from the canoe and draw towards you. It pulls the canoe towards your stroke.
Skulling Draw—A little more efficient than a straight draw, in the skulling draw you move your paddle blade like you’re icing a cake. Move it from side to side while you draw it towards you in the water. It moves your canoe sideways.
Back Stroke—If you want to go in reverse, use the back stroke. This is most used when pulling away from a dock or landing, or to move away from an obstacle you don’t want to hit.

Definitely watch the above video where Jason demonstrates each of these strokes one by one.
Did you miss Part 1 of this series? Click here to watch and read…
Learn more about Jason Eke and see more of his films on his website, Facebook and Instagram page.
What paddle questions can we help you with today? Get in touch with our Wisconsin-based Customer Service Team: 715-755-3405 • bbinfo@bendingbranches.com
More for you...


